Dayglow "Listerine" Breakdown
We are excited to be writing this tutorial about how to make all the sound design of the song "Listerine" by Dayglow. This song has been on repeat lately, and we can't get enough of its catchy melody and upbeat vibe.
For those who don't know, Dayglow is the musical project of Texas-based artist Sloan Struble. "Listerine" is one of the standout tracks (and our favorite) from his debut album "Fuzzybrain," which was released in 2019, the song features a unique blend of indie-pop and lo-fi, so whether you're a fan of Dayglow or just looking to expand your production skills, be sure to stay tuned to this tutorial so we can show you all the tips and tracks behind this amazing production.
-
Every sound in this breakdown comes from our Indie Pop Serum Pack. You can now recreate the full track instantly.
- 🎧 Grab it now and get 20% off with code BP01
- Want to learn more? Check out our Courses
RELATED BREAKDOWNS
- Wallows "Are You Bored Yet" Breakdown
- Harry Styles "As It Was" Breakdown
So its that time again where we use Serum as a sampler, we started by creating the sound of the main bass of the song using a Fender Jazz Bass, nce we had the sound we wanted, we recorded a C note with a long tail and imported it into Serum's noise oscillator and we enabled pitch tracking and one-shot mode, then we added an Analog_BD_Sin in oscillator "A" with some frequency modulation and in oscillator "B" we are using a Sweep20, now to get a more gritty sound we used the Ableton effect pedal in the OD mode with a gain of 5%.

The song starts with this Pad sound (and obviously with the main guitar which we did record) and it has a dreamy quality to it, first we need a Basic Shape in its second position in oscillator "A" and a Jno wavetable in oscillator "B", now the magic of this patch comes from LFO 1 which is modulating the frequency modulation from oscillator "A" and the Sync from oscillator "B" like you can see in the image below.

Now you can also see that LFO 1 is modulating a lot more, if we go to our FX tab we can see that the mix of the reverb, some filter parameters, the frequency from the phaser and the EQ are also being modulated.

This pads enter en the breakdown before the chorus and it was a hard task but once we got it right it added a whole new dimension to the track, first you need a Basic Shape in oscillator "A" and an IHasCanKick wavetable in oscillator "B", envelope 1 in modulating the cutoff of the filter so it opens at around 1.2 s, to get that out of tune sound you need to use an LFO to modulate the finetuning of both oscillators.

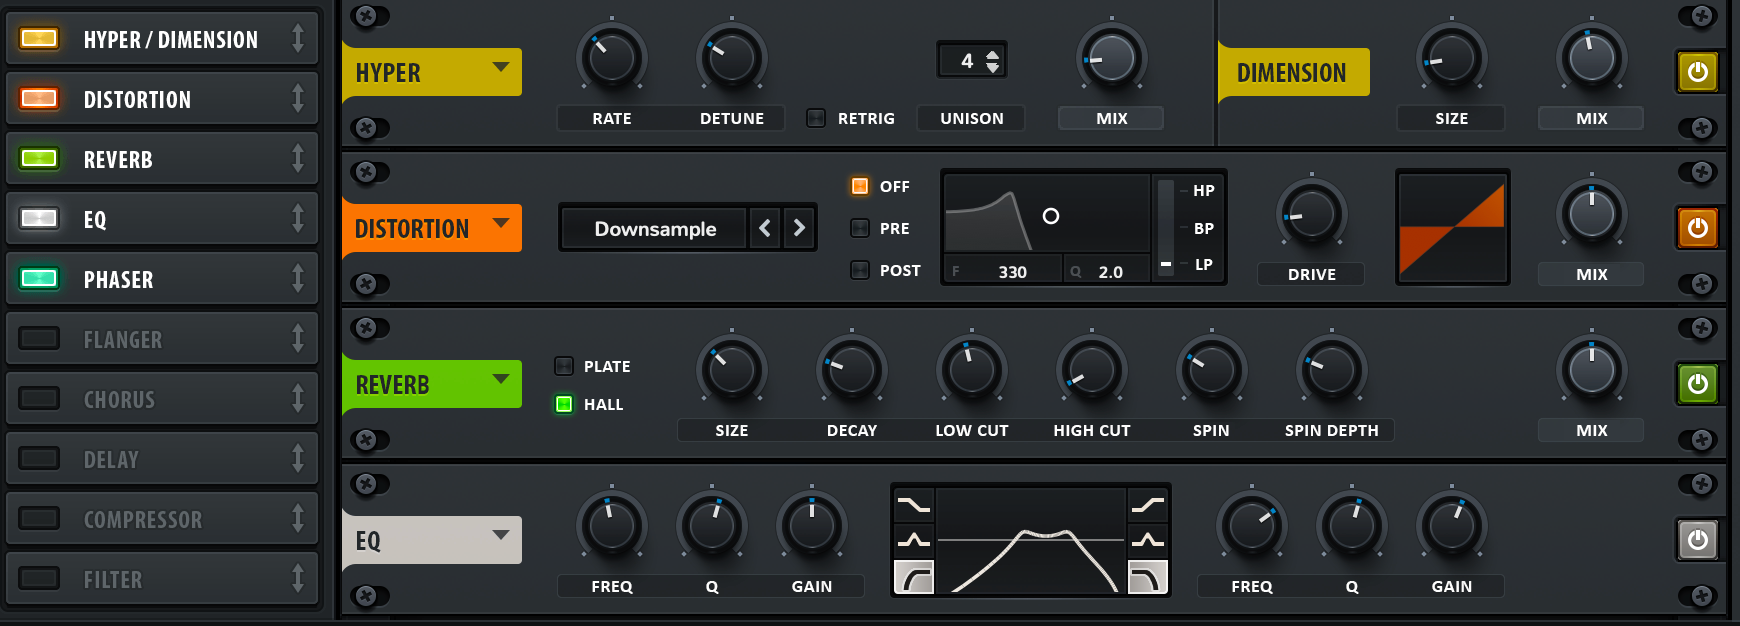
After that lets go to the FX tab and add a downsample distortion to get a more gritty sound and create an EQ curve like the one in the image below.
Creating this Synth sound from the track required a two-layer approach. The first layer was used to get more atmosphere vibe with a wider stereo image and the second layer added definition to the sound. This technique helped us achieve a sound almost identical to the original.
To program this first layer in Serum, start by using a Basic Shape in oscillator "A" and a PWM_Mdc in oscillator "B", envelope 1 needs to have an attack at around 200 ms, now the key to make this patch is in the filter, use a Band 24 with the mix at 90% and the cutoff at around 1kHz, now in the FX tab use a Hall reverb and add to taste.

To add definition to the atmospheric first layer, we created a second layer using a Jno wavetable in oscillator "A" and an ICanHasKick wavetable in oscillator "B", envelope 1 has an attack time of 60ms, and we used a Band 24 filter to shape the sound, we used an LFO to modulate the detune of both oscillators. This creates a subtle but effective modulation that resembles a tape flutter and adds depth and character to the sound.

The song's synth-like arpeggio sound is introduced early on and adds a fantastic energy to the track. While the patch itself is fairly simple, it's still a lot of fun to play. To create this patch, you'll need a Basic Shape in oscillator "A" and a Jno in oscillator "B", to cut some of the high frequencies, we used envelope 1 to modulate the cutoff of the filter, however, the real magic of this preset lies in the FX tab. By adding delay, reverb, and distortion, the sound becomes more three-dimensional and complex, adding depth and character to the music.