Chromeo "Lost And Found" Breakdown
Hey there, funky lovers! Today, we're making a tutorial about one of our top 5 favorite band and we are diving deep into the funky world of Chromeo, we love their groovy track, "Lost and Found." so if like us you've ever found yourself tapping your foot or bopping your head to the infectious beats of Chromeo, you're in for a treat.
Chromeo is composed of Canadian musicians Dave 1 (David Macklovitch) and P-Thugg (Patrick Gemayel), they have established themself as a pioneering force in funk music, so when we decided to create a tutorial, we knew we had to start with "Lost and Found" from their new album "Adult Contemporary."
Throughout this tutorial, we're going to break down the elements that give "Lost and Found" its signature sound. From the funky bass riffs to the shimmering synths and everything in between, we'll explore the techniques and tricks that Chromeo uses to create their infectious tunes, lets start.
- To Learn more, check out our Courses
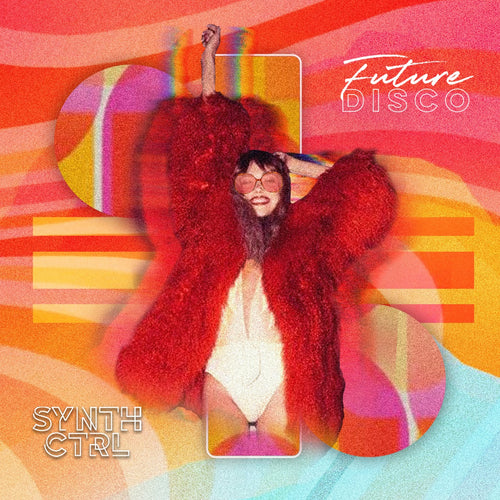
-Every sound in this breakdown comes from the Future Disco Serum Pack. You can now recreate the full track instantly
-🎧 Grab it now and get 20% off with code BP01
HOW TO SOUND LIKE CHROMEO
Let's kick things off with the amazing bassline. For our funky bass, we've crafted a groovy blend using a Basic Mg waveform with frequency modulation in oscillator "A". Meanwhile, in oscillator "B", we've added some punch with the ICanHasKick, complemented by a Saw wave in the suboscillator. To give it that plucky sound, we're using envelope 2 to modulate the filter cutoff. And don't forget to set the pitch bend to -12 decibels as we are going use it later. Lastly, in the FX section, we've applied multiband compression and distortion for added texture.

To achieve that signature bending effect heard at the end of every four bars, navigate to your MIDI clip and open the Clip View. Select the "Envelopes" tab and automate the pitch bend control.

In the bridge section, we've have these captivating keys, layered with a unique pad that has sidechain compression every quarter note. Let's hear the first layer.
Chromeo frequently incorporates this particular sound in their music, which we strongly suspect originates from a Rhodes electric piano. To recreate this sound, we've employed an FFT_Add_2nds waveform in oscillator "A," adding some grit with frequency modulation. Additionally, we've included a Sine wave in both the sub oscillator and oscillator "B." To achieve a drifting effect, we've applied an LFO to modulate the fine-tuning.

This layer adds movement and high end to the sound. To achieve this, we start with a Basic Mg wavetable in both oscillators, but with different wavetable positions; in oscillator "A," it's set to 166, and in oscillator "B," it's set to 15. The filter cutoff has some slightly movement coming from LFO 1. Additionally, LFO 3 modulates the level of all oscillators, creating a sidechain pumping effect every quarter note.

This element serves as pure ear candy, introducing just the right amount of tension just before the bridge. The synth patch comprises a Basic Mg waveform in oscillator "A" and an IHasCanKick waveform in oscillator "B." The key to this sound is its subtle opening, creating that swelling effect. This is achieved by using LFO 1 to modulate the filter cutoff, while simultaneously altering the wavetable position of oscillator "B" and the SYNC parameter of oscillator "A." This dynamic interplay adds high frequencies as the patch opens up.

As we enter the chorus of the track, we encounter a synth sound used in a lot of Chromeo's songs. This chorus synth comprises a SQR_SAW_wrd wavetable and an IHasCanKick wavetable. To achieve the brassy attack characteristic of this sound, we've employed envelope 2 with an attack time of 80ms to modulate the filter cutoff. Additionally, to impart that distinctive vibrato effect, we've used an LFO to modulate the fine-tuning. And there you have it!

Now, we delve into one of the most funk-infused segments of the track: the chorus stab, and crafting it was an absolute blast. To begin, we revisit the SQR_SAW_wrd and IHasCanKick wavetables. Set envelope 1 with an 80ms attack and a release of 0. For the exciting part, introduce modulation to the fine-tuning and detune of both oscillators using LFO 1. In the Matrix tab, assign envelope 3 as an auxiliary source, this will gradually increase the LFO modulation in the oscillators for a smooth buildup. And with that, we've laid the foundation for some serious funk!

Now lets introduce the bell sound that gracefully enters at the end of the chorus, its creation is very straightforward. Begin with a Harmonic Morph waveform in oscillator "A," positioning its wavetable at 190, and pair it with a Reese waveform in oscillator "B." Utilize the sub oscillator to introduce a Saw wave one octave higher, enhancing the brightness of the sound. Use envelope 2 to modulate the filter cutoff, opting for the MG Low 6 filter to achieve a gentle slope, allowing some high frequencies to shine through. Finally, in the FX tab, generously apply reverb and delay to create a sense of spaciousness and depth.

In the latter half of the chorus, the slap bass joins the track. To craft this, we began by recording a "C" note from our bass and loaded it into the noise oscillator. The key here lies in employing sine waves in both the "A" and "B" oscillators, and use the frequency modulation originating from the noise to mold them into resembling the one-shot sample added to the noise oscillator. This technique enriches the patch with layers, lending it a more authentic and realistic vibe.

As we reach the climax of the final chorus, a captivating arp sound emerges. Crafting it is a matter of selecting a square wave in oscillator "A" and a SQR_SAW_wrd in oscillator "B". We've employed an LFO to modulate the level of both oscillators, imparting that characteristic plucky quality to the sound. Additionally, we've utilized LFOs routed to the pan of each oscillator, introducing movement within the stereo image, adding dimension to the arrangement.